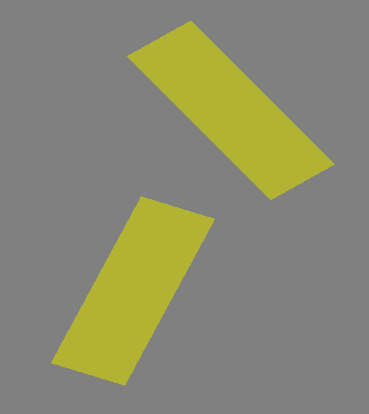
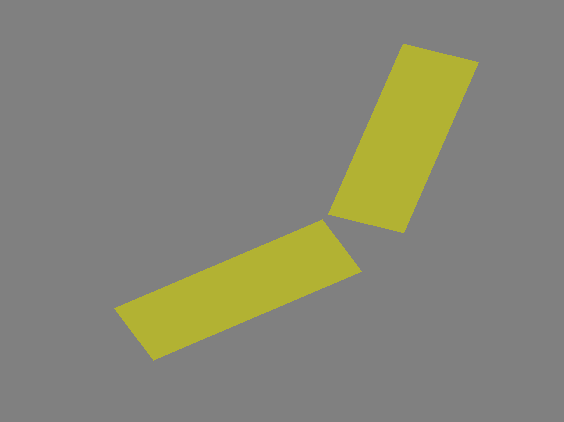
이번 글에서는 셰이더에 행렬 변환을 적용해보려고 한다.
이 예제로 한번 사람의 팔과 비슷하게 동작하는 프로그램을 작성해보려고 한다.
키보드를 눌러 각도를 조작하면 팔이 회전할 수 있다.
팔의 회전은 상박따로, 하박 따로 회전한다.
기본 코드 틀
#include <glad\glad.h>
#include <GLFW/glfw3.h>
#include "Shader.h"
#define STB_IMAGE_IMPLEMENTATION
#include "stb_image.h"
#include <glm\glm.hpp>
#include <glm\gtc\matrix_transform.hpp>
#include <glm\gtc\type_ptr.hpp>

float vertice[] {
	-0.3, -0.2, 1.0,  // left - bottom
	+0.3, -0.2, 1.0,  // right - bottom
	-0.3, +0.0, 1.0,  // left - top
	+0.3, +0.0, 1.0,  // right - top
};

unsigned int indice[] {
	0, 1, 2,
	1, 2, 3
};

int main() {
	// init
	glfwInit();
	glfwWindowHint(GLFW_CONTEXT_VERSION_MAJOR, 3);
	glfwWindowHint(GLFW_CONTEXT_VERSION_MINOR, 3);
	glfwWindowHint(GLFW_OPENGL_PROFILE, GLFW_OPENGL_CORE_PROFILE);

	GLFWwindow* window = glfwCreateWindow(800, 600, "arm", NULL, NULL);
	glfwMakeContextCurrent(window);

	gladLoadGLLoader((GLADloadproc)glfwGetProcAddress);

	// vbo, ebo, vao
	unsigned int VBO, EBO, VAO;
	glGenVertexArrays(1, &VAO);
	glBindVertexArray(VAO);

	glGenBuffers(1, &VBO);
	glBindBuffer(GL_ARRAY_BUFFER, VBO);
	glBufferData(GL_ARRAY_BUFFER, sizeof(vertice), vertice, GL_STATIC_DRAW);

	glGenBuffers(1, &EBO);
	glBindBuffer(GL_ELEMENT_ARRAY_BUFFER, EBO);
	glBufferData(GL_ELEMENT_ARRAY_BUFFER, sizeof(indice), indice, GL_STATIC_DRAW);

	glVertexAttribPointer(0, 3, GL_FLOAT, GL_FALSE, sizeof(float) * 3, (void*)0);
	glEnableVertexAttribArray(0);

	// shader
	Shader shader("5.1.transform.vs", "5.1.transform.fs");

	while (!glfwWindowShouldClose(window)) {
		glClearColor(0.5, 0.5, 0.5, 1.0);
		glClear(GL_COLOR_BUFFER_BIT);

		shader.use();
		glBindVertexArray(VAO);
		//glDrawElements(GL_TRIANGLES, 6, GL_UNSIGNED_INT, (void*)(sizeof(int)*1));

		// draw arm1
		glDrawElements(GL_TRIANGLES, 6, GL_UNSIGNED_INT, 0);

		// draw arm2
		glDrawElements(GL_TRIANGLES, 6, GL_UNSIGNED_INT, 0);

		glfwSwapBuffers(window);
		glfwPollEvents();
	}

	glfwTerminate();
}
다음과 같은 코드를 사용한다.

이렇게 칙칙한 노란색의 직사각형이 그려진다.
위치 변환 행렬 적용
코드를 보면 알다시피 똑같은 직사각형 2개를 겹쳐서 그린 상태다.
상박 옆에 하박으로 동작할 팔이 그려지도록 위치를 조정해보려고 한다.
// draw arm2
glm::mat4 trans2 = glm::translate(trans1, glm::vec3(0.5, 0.5, 0.0));
첫번째 팔을 그린 후에 두번째 팔을 그리기 전, 변환 행렬을 작성하였다.
x 축으로 0.5, y축으로 0.5 이동하는 변환행렬이다.
이제 변환행렬을 uniform 변수로 전달하고, 정점 셰이더에서 행렬을 곱해 적용해보자.
#version 330 core
layout (location = 0) in vec3 aPos;

uniform mat4 transform;
void main()
{
   //gl_Position = vec4(aPos, 1.0);
   gl_Position = transform*vec4(aPos, 1.0);
}
우선 vertex 셰이더는 위와 같이 작성했다.
// shader
glm::mat4 trans1(1.0);
Shader shader("5.1.transform.vs", "5.1.transform.fs");
shader.use();
unsigned int transform_Loc = shader.setMat4("transform", trans1);
또 셰이더를 생성하면서 transform 이라는 이름의 uniform 변수를 달아주었다.
유니폼 변수의 위치값은 변수에 저장해둔다.
왜냐하면 두번째 팔을 그릴 때 사용할 행렬은 첫번째 팔을 그릴 때 사용한 행렬과 달라지기 때문에 uniform 변수에 넘기는 값을 바꾸어주어야 하기 때문이다.
// draw arm1
shader.setMat4(transform_Loc, trans1);
glDrawElements(GL_TRIANGLES, 6, GL_UNSIGNED_INT, 0);

// draw arm2
glm::mat4 trans2 = glm::translate(trans1, glm::vec3(0.5, 0.5, 0.0));
shader.setMat4(transform_Loc, trans2);
glDrawElements(GL_TRIANGLES, 6, GL_UNSIGNED_INT, 0);
렌더링 루프에서는 이렇게 해주었다.
trans1 행렬 (단위행렬) 기준으로 첫번째 팔을 그려주고,
trans1 행렬에 위에서 이동 변환을 적용한 trans2 행렬 기준으로 두번째 팔을 그려준다.

실행결과 팔 2개가 서로 다른 위치에 그려지는 것을 볼 수 있다.
한번 키보드를 눌렀을 때 위치가 바뀌도록 이벤트도 달아보자.

메인함수 위에 위치의 변화량을 저장할 전역 변수를 선언한다.
void process_input(GLFWwindow* window) {
	if (glfwGetKey(window, GLFW_KEY_LEFT) == GLFW_PRESS) {
		x_pos -= 0.001;
	}
	else if (glfwGetKey(window, GLFW_KEY_RIGHT) == GLFW_PRESS) {
		x_pos += 0.001;
	}
}
다음과 같이 키보드 좌우 화살표에 대한 이벤트를 처리하였다.

두번째 팔을 그릴 때 변환 행렬의 변화량을 전역변수 값으로 세팅한다.
이제 실행해보면

자유롭게 좌/우 위치를 옮길 수 있다.
마치 게임을 만드는 것 같다
회전 변환 행렬 적용

다시 팔을 돌리기 위해 초기 팔 위치는 위와 같이 고정시켜두었다.

이렇게 그려진다.
이제 rotate 함수를 이용해 회전 변환을 적용해보자.
이제는 arm1, arm2 에 행렬이 따로 따로 적용될 수 있기 때문에 아래와 같이 내부에서 사용하는 전용 행렬을 달아주었다.
// draw arm1
glm::mat4 trans1 = trans;
trans1 = glm::rotate(trans1, glm::radians(45.0f), glm::vec3(0, 0, 1.0));
shader.setMat4(transform_Loc, trans1);
glDrawElements(GL_TRIANGLES, 6, GL_UNSIGNED_INT, 0);

// draw arm2
glm::mat4 trans2 = glm::translate(trans1, glm::vec3(0.65, 0.0, 0.0));
shader.setMat4(transform_Loc, trans2);
glDrawElements(GL_TRIANGLES, 6, GL_UNSIGNED_INT, 0);

좌표계를 z축 중심으로 45도 돌려놓은 상태에서 arm1 을 그리고,
arm1을 그린 이후 그 시점의 좌표계를 x 축 방향으로 0.65만큼 옮긴다음 arm2를 그리므로 위와 같이 그려진다.
이제 arm2 에도 회전 행렬을 적용해주고, 회전량에 대한 전역변수를 달아서 키보드를 통해 팔을 돌릴 수 있도록 해주자.
		// draw arm1
		glm::mat4 trans1 = trans;
		trans1 = glm::rotate(trans1, glm::radians(arm1_degree), glm::vec3(0, 0, 1.0));
		shader.setMat4(transform_Loc, trans1);
		glDrawElements(GL_TRIANGLES, 6, GL_UNSIGNED_INT, 0);

		// draw arm2
		glm::mat4 trans2 = glm::translate(trans1, glm::vec3(0.65, 0.0, 0.0));
		trans2 = glm::rotate(trans2, glm::radians(arm2_degree), glm::vec3(0, 0, 1.0));
		shader.setMat4(transform_Loc, trans2);
		glDrawElements(GL_TRIANGLES, 6, GL_UNSIGNED_INT, 0);

키보드로 회전할 수 있다.
다만, 회전 중심이 그려지는 물체의 중심점에 있어서 관절에서 회전하는 느낌은 아니다.
관절 중심으로 회전하려면, 물체의 절반 사이즈만큼 이동해서 관절위치로 이동한 다음, 거기서 회전하고 다시 나머지 절반을 이동해서 팔을 그리면 될 것 같다.

성공이다.
하다보니 재밌는데 한번 유니티 개발도 해볼까 하는 생각이 든다ㅋㅋ
전체 소스 코드
#include <glad\glad.h>
#include <GLFW/glfw3.h>
#include "Shader.h"
#define STB_IMAGE_IMPLEMENTATION
#include "stb_image.h"
#include <glm\glm.hpp>
#include <glm\gtc\matrix_transform.hpp>
#include <glm\gtc\type_ptr.hpp>
#include <iostream>

float vertice[] {
	-0.3, -0.1, 1.0,  // left - bottom
	+0.3, -0.1, 1.0,  // right - bottom
	-0.3, +0.1, 1.0,  // left - top
	+0.3, +0.1, 1.0,  // right - top
};

unsigned int indice[] {
	0, 1, 2,
	1, 2, 3
};

void process_input(GLFWwindow*);
void print_mat4(glm::mat4& mat);

float x_pos = 0, y_pos = 0;
float arm1_degree = 0, arm2_degree = 0;

int main() {
	// init
	glfwInit();
	glfwWindowHint(GLFW_CONTEXT_VERSION_MAJOR, 3);
	glfwWindowHint(GLFW_CONTEXT_VERSION_MINOR, 3);
	glfwWindowHint(GLFW_OPENGL_PROFILE, GLFW_OPENGL_CORE_PROFILE);

	GLFWwindow* window = glfwCreateWindow(800, 600, "arm", NULL, NULL);
	glfwMakeContextCurrent(window);

	gladLoadGLLoader((GLADloadproc)glfwGetProcAddress);

	// vbo, ebo, vao
	unsigned int VBO, EBO, VAO;
	glGenVertexArrays(1, &VAO);
	glBindVertexArray(VAO);

	glGenBuffers(1, &VBO);
	glBindBuffer(GL_ARRAY_BUFFER, VBO);
	glBufferData(GL_ARRAY_BUFFER, sizeof(vertice), vertice, GL_STATIC_DRAW);

	glGenBuffers(1, &EBO);
	glBindBuffer(GL_ELEMENT_ARRAY_BUFFER, EBO);
	glBufferData(GL_ELEMENT_ARRAY_BUFFER, sizeof(indice), indice, GL_STATIC_DRAW);

	glVertexAttribPointer(0, 3, GL_FLOAT, GL_FALSE, sizeof(float) * 3, (void*)0);
	glEnableVertexAttribArray(0);

	// shader
	glm::mat4 trans(1.0);
	Shader shader("5.1.transform.vs", "5.1.transform.fs");
	shader.use();
	unsigned int transform_Loc = shader.setMat4("transform", trans);

	while (!glfwWindowShouldClose(window)) {
		process_input(window);

		glClearColor(0.5, 0.5, 0.5, 1.0);
		glClear(GL_COLOR_BUFFER_BIT);

		shader.use();
		glBindVertexArray(VAO);
		//glDrawElements(GL_TRIANGLES, 6, GL_UNSIGNED_INT, (void*)(sizeof(int)*1));

		// draw arm1
		glm::mat4 trans1 = trans;
		trans1 = glm::rotate(trans1, glm::radians(arm1_degree), glm::vec3(0, 0, 1.0));
		shader.setMat4(transform_Loc, trans1);
		glDrawElements(GL_TRIANGLES, 6, GL_UNSIGNED_INT, 0);

		// draw arm2
		glm::mat4 trans2 = glm::translate(trans1, glm::vec3(0.35, 0.0, 0.0));
		trans2 = glm::rotate(trans2, glm::radians(arm2_degree), glm::vec3(0, 0, 1.0));
		trans2 = glm::translate(trans2, glm::vec3(0.35, 0.0, 0.0));
		shader.setMat4(transform_Loc, trans2);
		glDrawElements(GL_TRIANGLES, 6, GL_UNSIGNED_INT, 0);

		glfwSwapBuffers(window);
		glfwPollEvents();
	}

	glfwTerminate();
}

void print_mat4(glm::mat4& mat) {
	for (int row = 0; row < 4; row++) {
		for (int col = 0; col < 4; col++) {
			std::cout << mat[col][row] << ' ';
		}
		std::cout << '\n';
	}
}

void process_input(GLFWwindow* window) {
	if (glfwGetKey(window, GLFW_KEY_LEFT) == GLFW_PRESS) {
		arm1_degree += 0.1;
		if (arm1_degree > 360.0f) {
			arm1_degree = 0;
		}
	}
	else if (glfwGetKey(window, GLFW_KEY_RIGHT) == GLFW_PRESS) {
		arm1_degree -= 0.1;
		if (arm1_degree < 0) {
			arm1_degree += 360.0;
		}
	}
	else if (glfwGetKey(window, GLFW_KEY_UP) == GLFW_PRESS) {
		arm2_degree += 0.1;
		if (arm2_degree > 360.0f) {
			arm2_degree = 0;
		}
	}
	else if (glfwGetKey(window, GLFW_KEY_DOWN) == GLFW_PRESS) {
		arm2_degree -= 0.1;
		if (arm2_degree < 0) {
			arm2_degree += 360.0;
		}
	}
}
메인코드
#version 330 core
out vec4 FragColor;

void main()
{
   FragColor = vec4(0.7, 0.7, 0.2, 1.0);
}
프래그먼트 셰이더 코드
#version 330 core
layout (location = 0) in vec3 aPos;

uniform mat4 transform;
void main()
{
   //gl_Position = vec4(aPos, 1.0);
   gl_Position = transform*vec4(aPos, 1.0);
}
정점 셰이더 코드
'CS > HCI 윈도우즈프로그래밍' 카테고리의 다른 글
| [OpenGL] 18. Transformation (6) - View Change (VCS) (0) | 2024.04.21 |
|---|---|
| [OpenGL] 17. Transformation (5) - Projection & Perspective Normalization (0) | 2024.04.20 |
| [OpenGL] 15. Transformation (3) - GLM 사용하기 (0) | 2024.04.19 |
| [OpenGL] 14. Transformation (2) - 복합 변환 (0) | 2024.04.18 |
| [OpenGL] 13. Transformation (1) - 변환의 기본 개념 (0) | 2024.04.17 |
